Originally written for: Lexmark E232T
These instructions will help explain photoconductor kit installation steps for a Lexmark E232T and similar models.
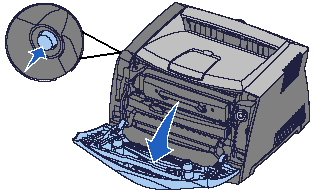
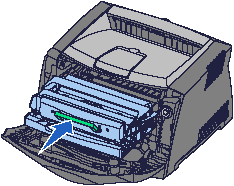
1) Open the front cover by pressing the button on the left side of the printer and lowering the cover, as shown.
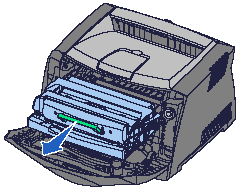
2) Pull on the toner cartridge handle to remove the cartridge.
IMPORTANT! Do not press the button on the print cartridge assembly.
3) Place the print cartridge assembly on a flat, clean surface.
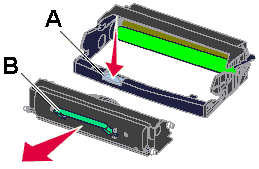
4) Remove the toner cartridge. To do this:
- Press the release button (A) on the base of the print cartridge assembly.
- Pull the toner cartridge up and out using the green handle (B).
5) Unpack the new photoconductor kit.
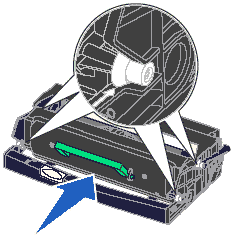
6) To install the toner cartridge in the new print cartridge assembly, align the white rollers on the toner cartridge with the white arrows on the tracks of the photoconductor kit. Push the toner cartridge in as far as it will go. The cartridge will click into place when correctly installed.
7) To install the print cartridge assembly into the printer, align the green arrows on the guides of the assembly with the green arrows on the tracks in the printer. Push the assembly in as far as it will go.
8) Close the front cover.
9) Power the printer back on.
10) Send a print job to the printer to confirm that the printer is working correctly with the new photoconductor unit.
IMPORTANT! You will also need to reset the page count on the photoconductor unit. Failure to do this will cause the printer to display a photoconductor exhausted error message. For information about resetting this counter, refer to the instruction sheet that shipped with the new photoconductor kit.
- Publisher: Precision Roller


 Konica Minolta Intermediate Image Transfer Unit


