1) Remove the left side, back, right side, and top covers.
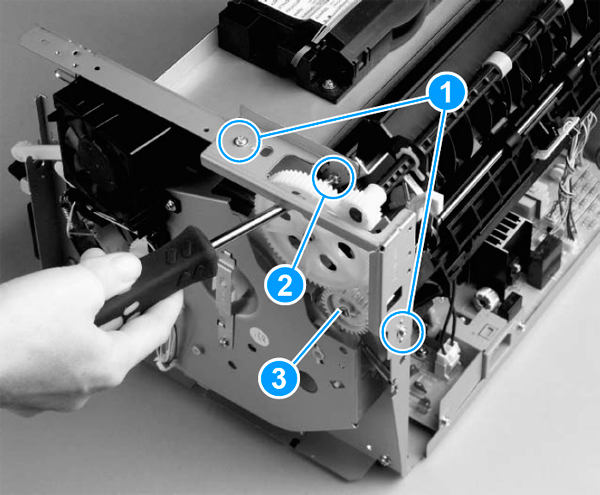
2) Remove two screws (callout 1) from the right fuser plate.
3) Remove a third screw (callout 2) from behind the large gear on the right fuser plate.
Note: You can access the third screw through the holes in the 69T gear. If you need to realign the 69T gear, you must first remove the pressure roller gear. Release the tab (callout 3) and remove the pressure roller gear from the printer.
4) Remove the bracket.

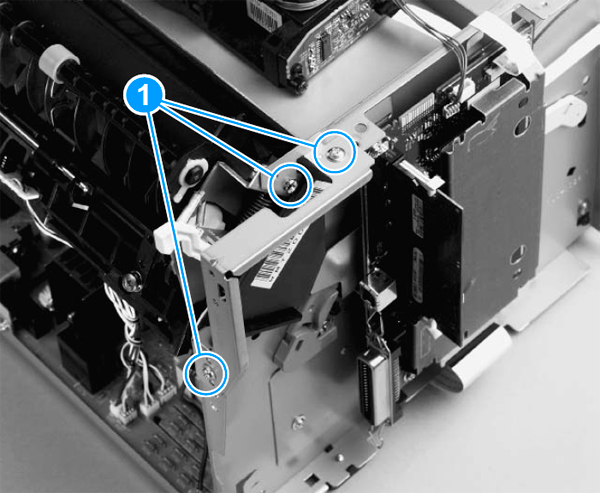
5) Remove three screws (callout 1) from the left fuser plate.
6) Remove the bracket.

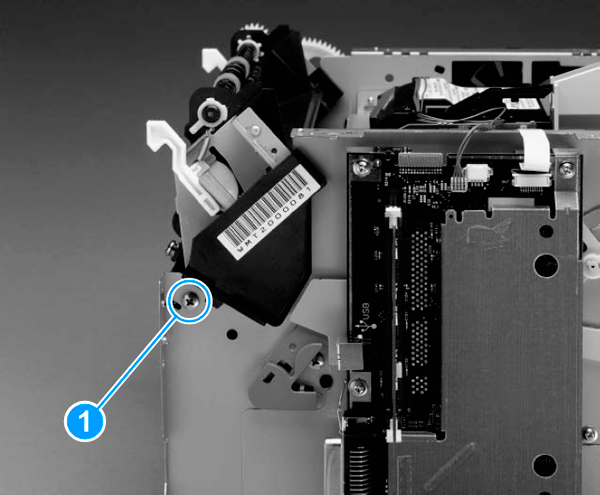
7) Remove two screws (callout 1); one from each side of the printer.

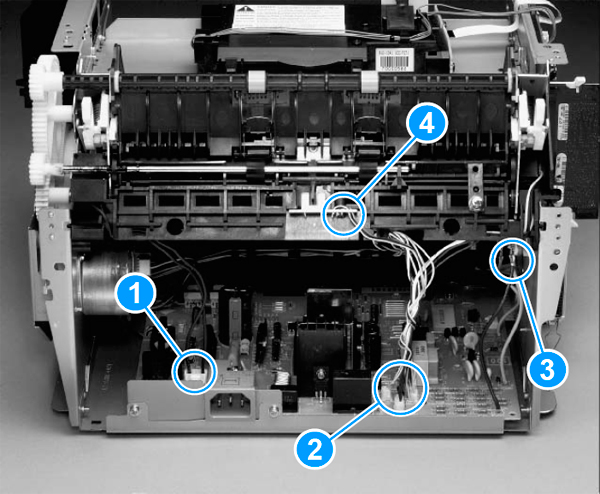
8) Unplug the fuser cable connector (callout 1) by pressing and releasing the tab on the back of the connector.
9) Unplug five smaller cable connectors (callout 2) from the ECU and unwind the cables from the fuser assembly.
10) Unplug the spade connector (callout 3).
11) Remove one screw (callout 4) from the paper delivery sensor, and lift the paper delivery sensor out of the printer.
12) Gently lift the fuser assembly out of the printer.
