 |
My Printers |
► |
Or browse by model:


|
HP DesignJet 700 Carriage Belt Installation Instructions
HP DesignJet 700 Carriage Belt Installation Instructions
Originally written for: HP DesignJet 700
How to replace the carriage belt on an HP DesignJet 700 and similar models.
Contents
- Introduction
- Instructions
- Additional Resources
Introduction
The HP DesignJet 700 is a mid-range inkjet printer platform. It features a true print resolution of 600dpi, built-in Bitronics and RS-232 I/O ports. It handles cutsheet and roll media sizes from A4/A to A1/D or A0/E depending on the model number.
Precision Roller provides a kit including the Torx Screwdriver and Carriage Belt (PR# A1445) - OEM Part #: [C4557-40049], [C455740049]
For printer drivers, see the HP DesignJet 700 support page.
Instructions
- First, unplug the printer and remove any paper in the printer’s Input Tray. Next, remove the printer lid (Access Door). Raise the lid (Access Door) to the open position (perpendicular) and lift up on one side and then the other; each side should snap out of the printer.

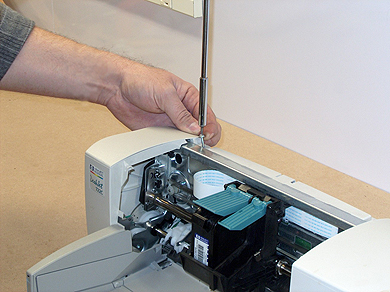
- After you have removed the printer lid (Access Door), you will see two top screws (one on each side). Remove the two top screws with a T-10 Torx Screwdriver.
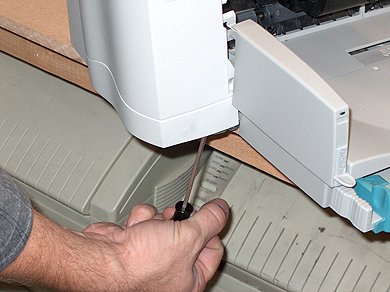
- Next, remove the left end cap. On the left side of the bottom of your DesignJet, there will be a plastic tab on both the front and back. The easiest way to access the tabs is to move the corner of the printer over the edge of your work surface - just enough to insert a standard screwdriver. Insert the standard screwdriver between the plastic and the metal frame, pry gently outward while lifting the top of the end cap upward with your other hand. When one of the tabs comes loose the other will easily follow.
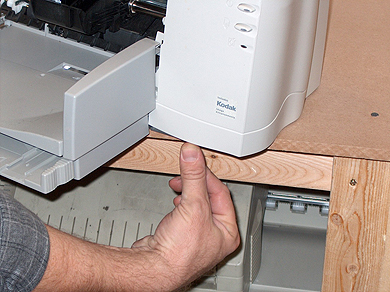
- After removing the left end cap, remove the printer’s right end cap the same way. Use caution when removing, because a set of wires will still be connected between the right end cap and the printer body.
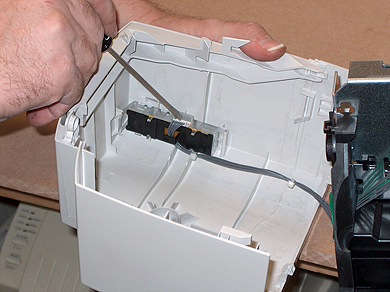
- After removing the cover, gently unplug the connector to disconnect the wire from the front panel printer control buttons.
- Next, insert the blade of the screwdriver into the coils of the spring and unhook it from the right side. This will remove the tension from the printhead carriage belt.

- On the left side, remove the printhead drive belt from around the motor gear. If the teeth of the gear are full of dust and buildup, the teeth should be gently cleaned one-by-one with a pointed instrument.

- There is a plastic encoder strip that runs the width of the printer. On the left side of the strip there is a metal plate that acts as a spring. Release the tension and unhook the strip. Then unhook the strip on the right side. You don’t have to remove the strip from the printer, just unhook it.

- On the right-hand side, there is a piece of black plastic that controls the height of the axle. Use a permanent marker to mark which hole the end of the plastic tab is aligned to - don’t rotate the piece. Insert the blade of the screwdriver between the plastic and the metal side of the printer. Gently pry the plastic out to the end of the axle and the axle will fall down and out. Note: When reinstalling the plastic tab, be sure to line it back up with the mark you made.

- Pull the axle toward the front of the printer, and the left side will come loose as well. Then, lay the printhead carriage down on its front and you will see where the belt attaches to the printhead carriage.

- Note: For the next steps, use caution to avoid touching the circuit boards and electronic components. Remove the old carriage belt from the loop.

- Put the new printhead belt through the channel. Then, pull it tight and press it down in the channel as far as it will go.
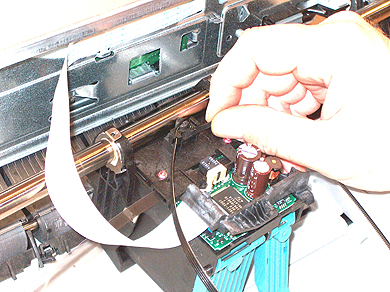
- Put the DesignJet 700 printer back together the opposite way you took it apart. First, move the belt back to the general area of the original position and flip the printhead carriage back upright. Then, place the left side of the axle rod in the hole, slide the right side into the slot, and align the plastic tab to the mark you made in step 9. Put the belt onto the left gear first and then the right gear. Next, reattach the spring you removed in step 6. Don’t forget to reinstall the plastic encoder strip - put the left side on the spring and stretch spring onto the right side. After replacing the covers, connect the printer to power and test.
Additional Resources
- HP DesignJet 700 Carriage Belt Replacement Kit (PR# A1445)
- Publisher: Precision Roller
|
|


 Ricoh Black Toner Cartridge


