Originally written for: Brother HL-2240D
Also applies to: Brother HL-2220, 2230, 2240, 2270DW, 2280DW, MFC-7360N, 7460DN, 7860DW
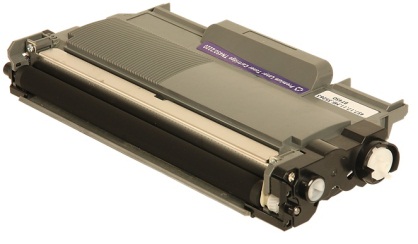
These instructions explain toner installation procedures for a Brother TN420/TN450 toner cartridge.
|
To order your replacement cartridge for this printer refer to the following part number: N5480 (OEM # TN-450, TN-420)
Introduction
The original toner cartridge that was included with this machine may either be a starter, standard, or a high yield cartridge. When the toner becomes low, the TONER LED indicator light will flash continuously until replaced. Once the toner cartridge is empty, the printer will enter a “REPLACE TONER” mode that ceases print functionality until the toner cartridge is replaced. A new and unused toner cartridge will reset the “REPLACE TONER” mode.
|
 |
Before You Begin
Before you begin please take time to perform the following steps to ensure that the new print cartridge is properly detected by your Brother printer:
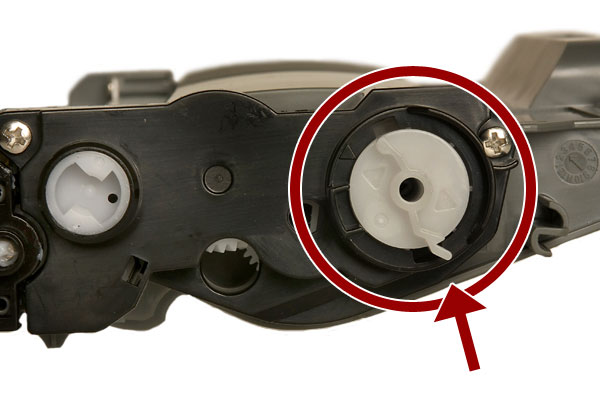
- Check to ensure that the dial on the left side of the cartridge is in the position as illustrated in the image below. If not, turn the dial counter clockwise until it matches the position in the image.
- Check to make sure that the printer is powered up during the entire process. Changing the cartridge with the printer powered off will not reset the “REPLACE TONER” mode. In the event that the printer is powered off when the cartridge is installed, you will need to remove the cartridge and repeat step one before reinstalling the cartridge.
- In the event that your machine will not reset out of the “REPLACE TONER” mode, click here for instructions on how to reset the “REPLACE TONER” mode manually.
Replacing the Toner Cartridge
- Make sure that the machine is powered up.
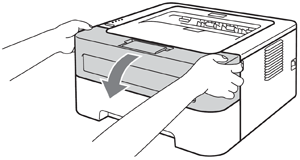
- Open the front cover of the machine.
- Remove both the drum unit and toner cartridge assembly.
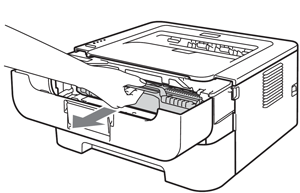
- Push down the green lock lever and take the toner cartridge out of the drum unit.
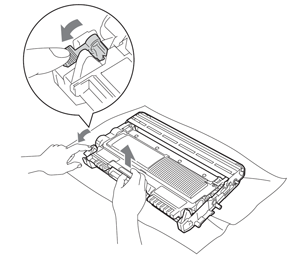
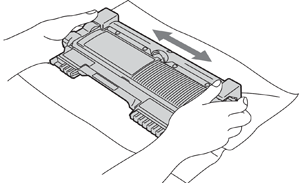
- Unpack the new toner cartridge. Hold the cartridge level with both hands and gently shake it from side to side several times in order to distribute the toner evenly inside of the cartridge.
- Pull off the protective cover.
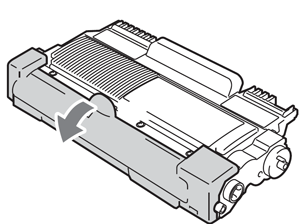
-
Note: Before installing this cartridge, please check to ensure that the dial on the left side of the new cartridge is positioned identical to the image below. If not, turn the dial counter-clockwise until it matches the dial position in the image. It is imperative that this dial be locked into position as illustrated to ensure that the printer detects that a new cartridge has been installed and resets the “REPLACE TONER” mode.
- Put the new toner cartridge firmly into the drum unit you hear and feel it lock into place. If installed successfully, the green lock lever will lift automatically.
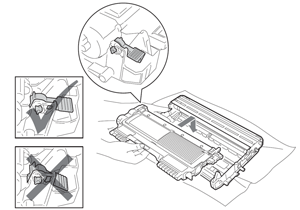
- Clean the primary corona wire inside of the drum unit by gently sliding the green tab from right to left and left to right several times.
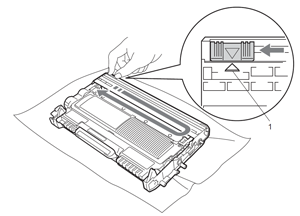
Note: Be sure to return the tab to the home position (^) (1). If you do not, printed pages may contain a vertical stripe.
- Reinstall the drum unit and toner cartridge assembly back into the machine. Close the front cover.
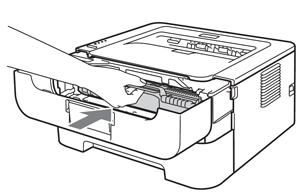
Note: Do NOT turn off the machine’s power switch or open the front cover until the “Ready” LED has illuminated.
- Publisher: Precision Roller


 Konica Minolta Color ( C / M / Y ) Drum Unit - Sold each


