Originally written for: Ricoh Aficio MP C4000
Also applies to: Ricoh Aficio MP C2000, C2000SPF, C2500, C2500SPF, C2800, C2800SPF, C3000, C3000SPF, C3300, C3300SPF, C3500, C3500E1, C3500SPF, C4000SPF, C4500, C4500E1, C4500SPF, C5000, C5000SPF

Contents
- Introduction
- Disassembly
- Cleaning
- Reassembly
Introduction
The following document outlines the procedure for rebuilding the new style drum unit with the Ricoh OPC Drum and Blade Kit (PR# P3830).
Disassembly
-
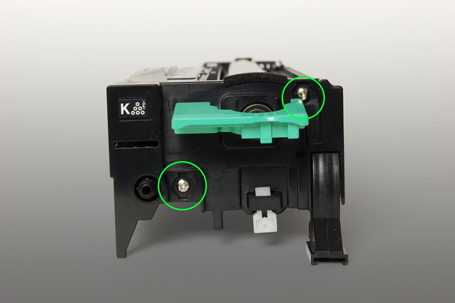
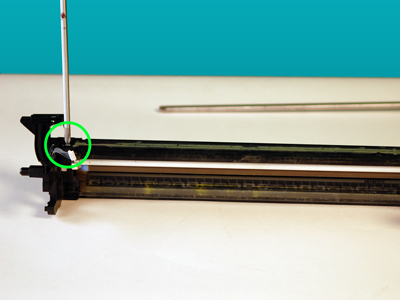
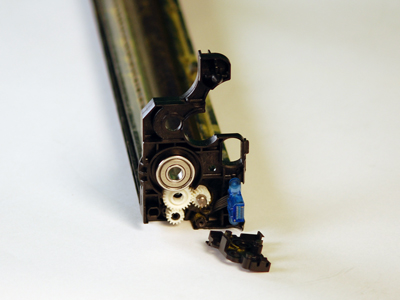
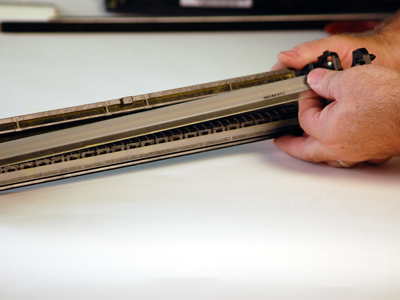
Remove the two screws (as shown) from the front cover assembly of the drum unit. Carefully pull the cover assembly away from the drum. The front cover of the drum unit should now be removed.
-
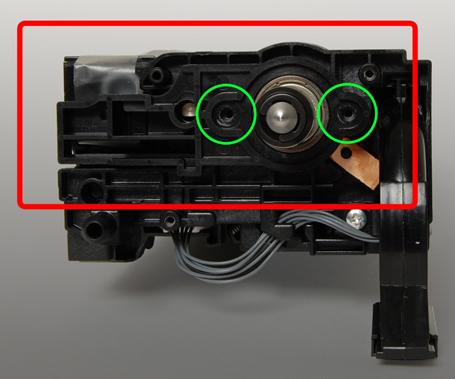
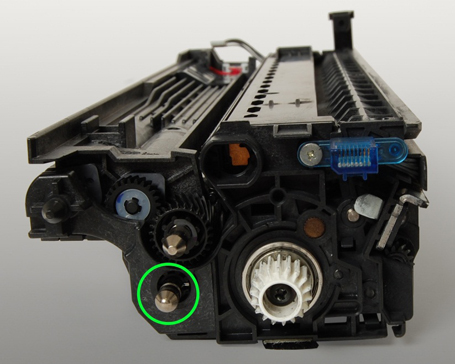
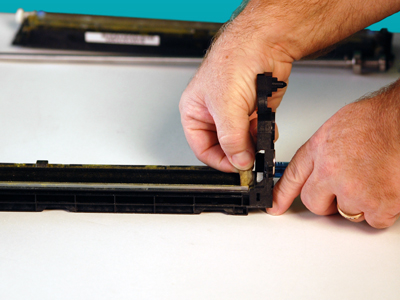
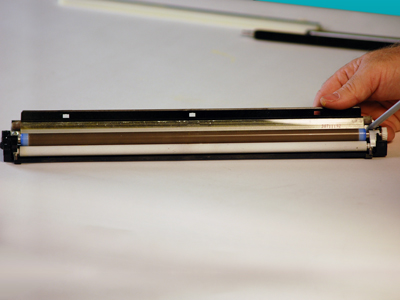
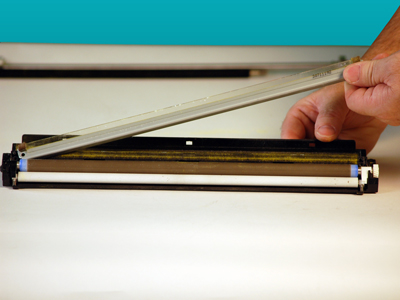
Remove the pictured retaining screws from the drum and developer retaining assembly. Remove the retaining plate off of the shaft. This can be done by gently pulling the plate towards you.
-
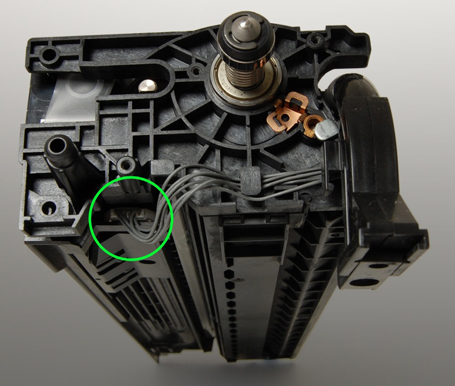
Disconnect developer sensor wiring harness from the imaging unit.
-
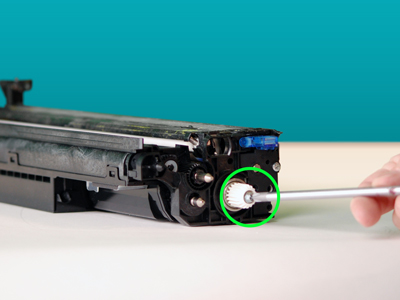
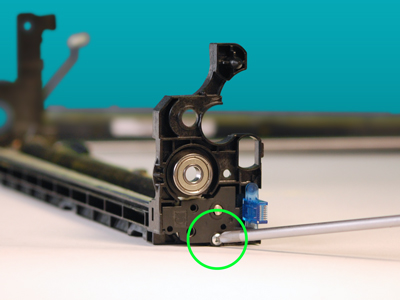
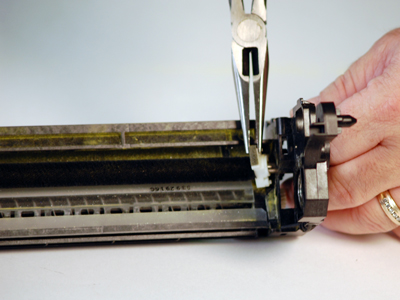
On the opposite end of the drum shaft there is a gear retaining screw. Carefully remove the gear retaining screw.
-
Remove E-clip and bushing from the developer unit shaft.
-
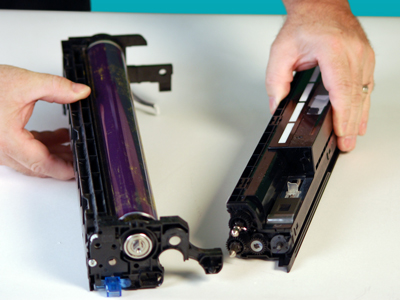
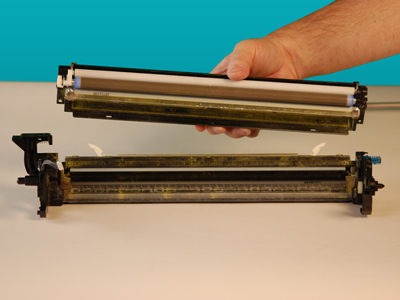
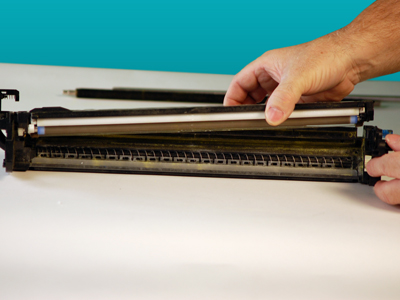
Carefully separate the developer assembly from the drum unit.

-
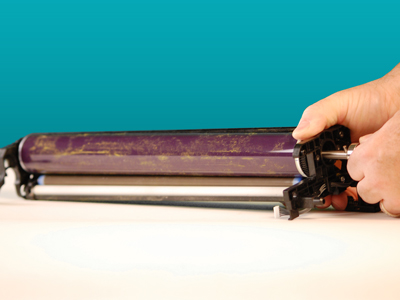
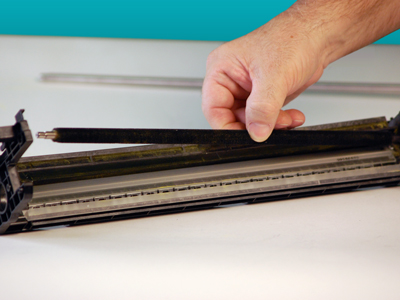
Slide the drum shaft out of the drum unit and remove it. Place the drum shaft nearby as you will need this during reassembly.
- Remove and properly dispose of the used OPC drum.
-
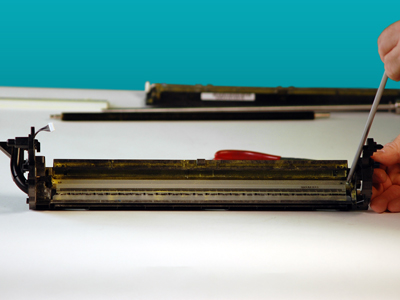
Remove the two screws that hold the cleaning assembly in place. Gently remove the cleaning assembly. Caution: Do not lose the two drum blade screw retention plates.
-
Remove side seals.
-
Remove the gear drive cover from the drum unit.
-
Carefully remove the drum cleaning brush from drum assembly.
-
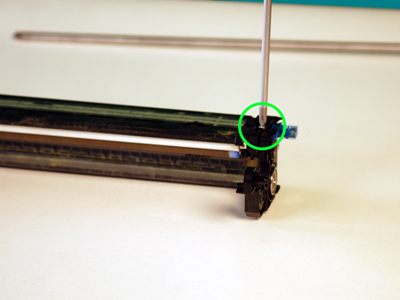
Remove the two screws that hold the cleaning blade in place.
-
Remove the old cleaning blade by gently pulling the drum blade away from housing. Dispose of the used drum blade as it will no longer be needed.
Cleaning
-
Vacuum and remove any excess waste toner that has accumulated on the cleaning housing and waste unit cavity.

Reassembly
-
Install new cleaning blade onto waste unit. Make sure that the waste unit drive gear is in proper alignment to avoid damage.

-
Reinstall the drum cleaning brush that was removed in step 12.

-
Remove the old lubricant supply blade. Dispose of this item as it will no longer be needed.
-
Install new lubricant supply blade.
-
Re-install cleaning unit into imaging unit.
- Install the new OPC drum by starting with step 7 and performing all steps from step 7 to step 1. (Step 1 will be your final step in this installation.)
- Publisher: Precision Roller


 HP 55X Black High Yield Toner Cartridge