|
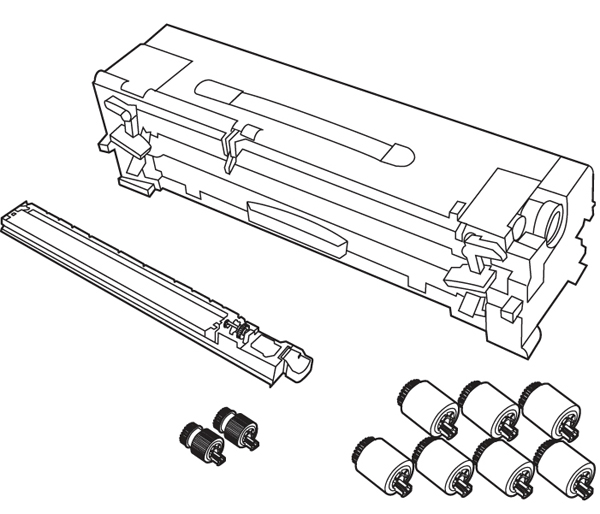
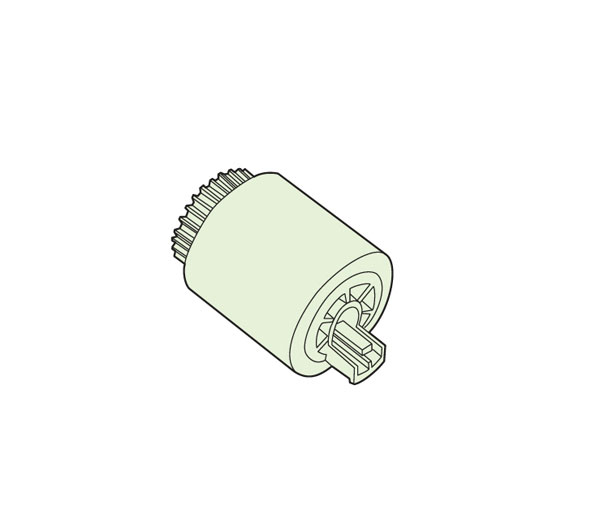
The Printer Maintenance Kit contains two Type 1 rollers, seven Type 2 rollers, one transfer roller assembly, and one fuser assembly. Note: The printer shown in this guide may not represent your particular model.
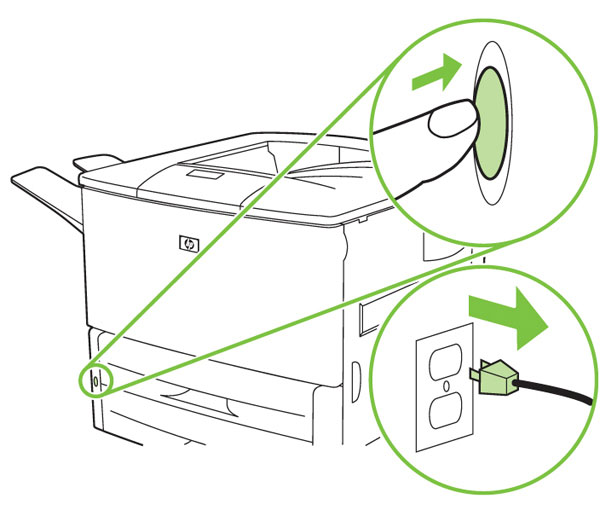
1) A) Press the power button to turn the power off (button out). B) Disconnect the power cord from the AC outlet.
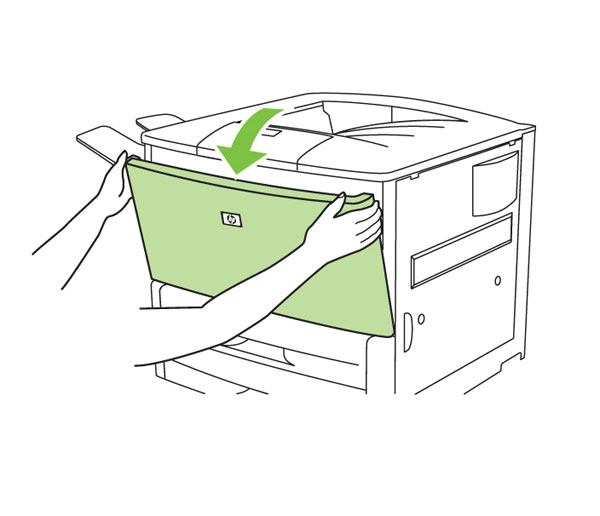
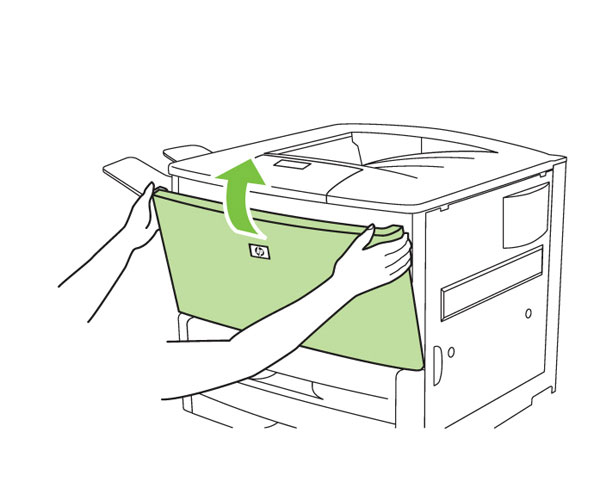
2) To replace the transfer roller assembly: Open the front door of the printer.
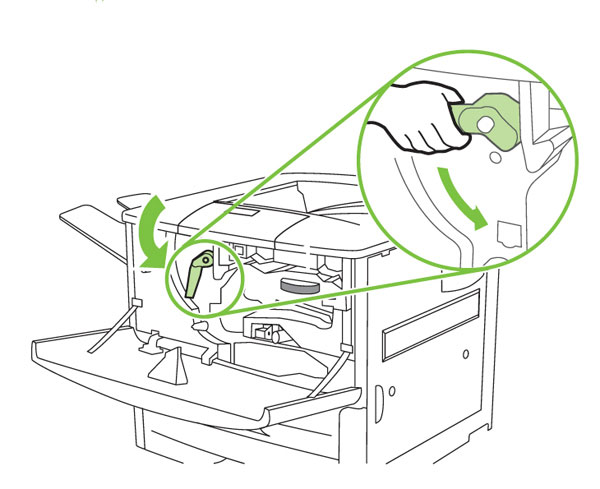
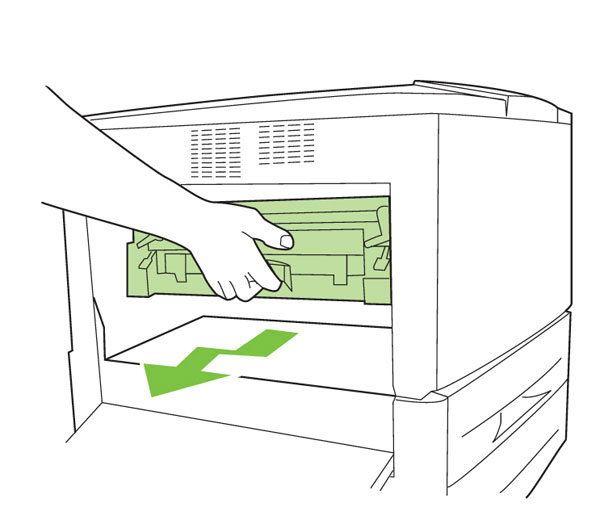
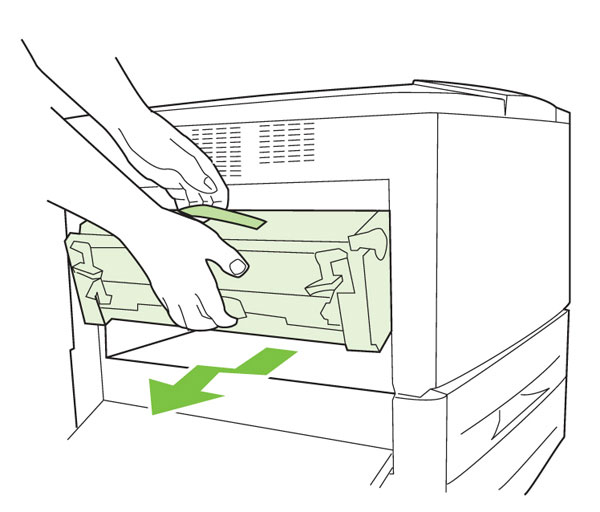
3) Rotate the large green lever downward.
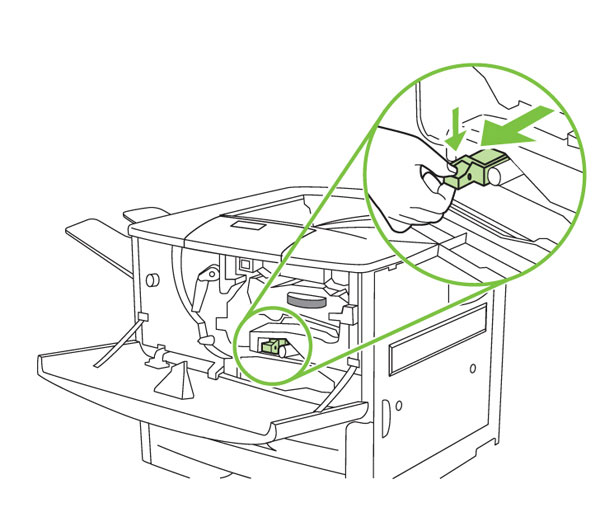
4) Pinch the blue tab on the transfer roller assembly, and pull the assembly out of the printer.
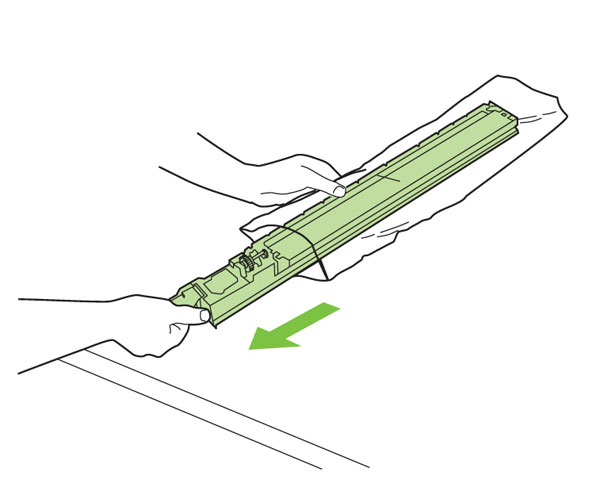
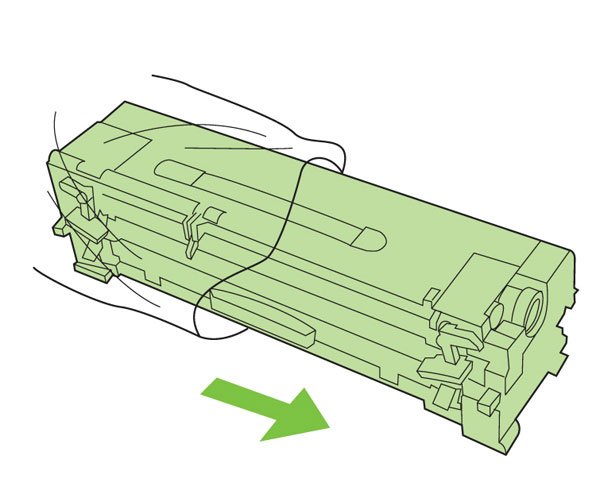
5) Remove the new transfer roller assembly from its packaging. CAUTION: Do not touch the black foam roller. Skin oils can damage the roller.
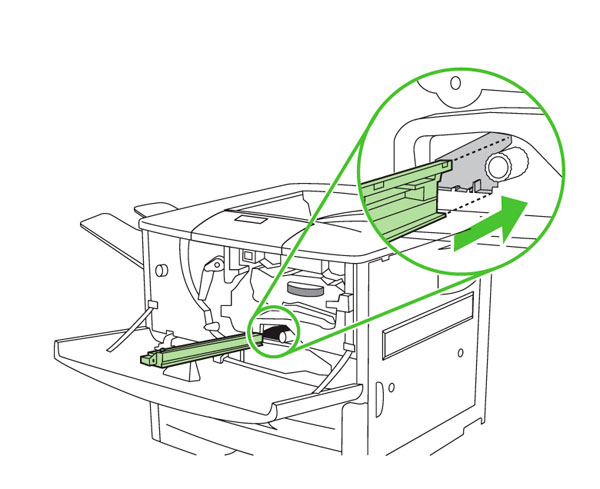
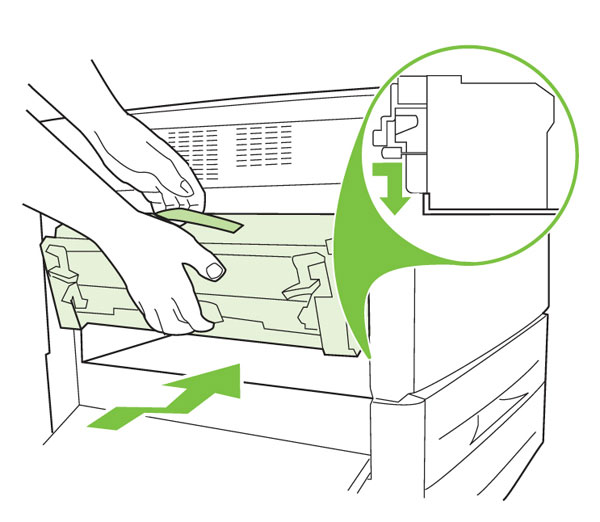
6) Insert the new transfer roller assembly into the printer until it locks into place.

7) Press the white button on the large green lever, and rotate the lever upward until it locks into place. NOTE: Do not force the lever into position. If the lever does not rotate easily, repeat Steps 5 and 6 to reseat the transfer roller assembly.
8) Close the front door of the printer.
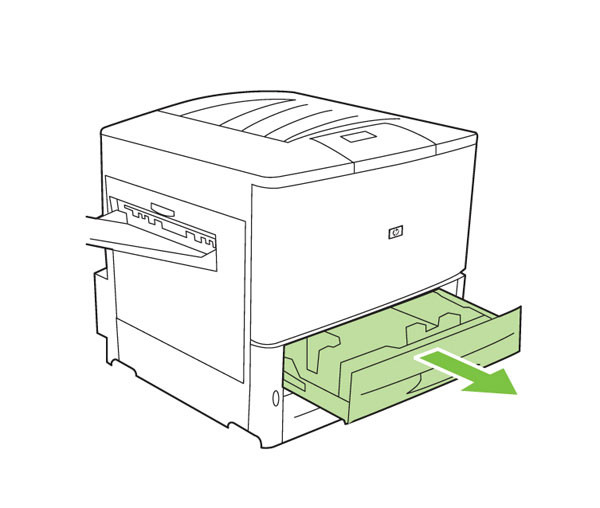
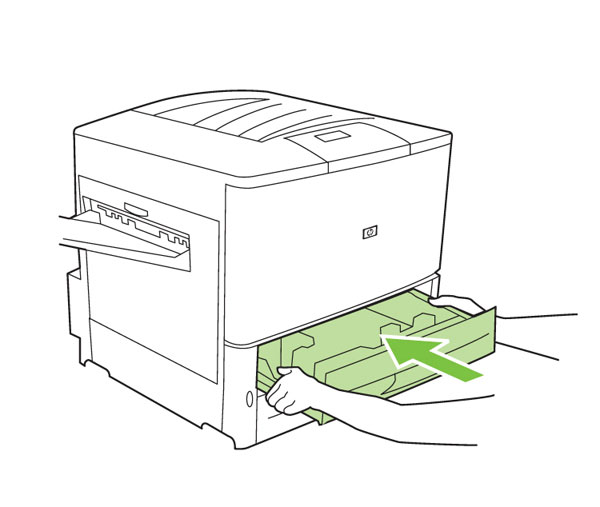
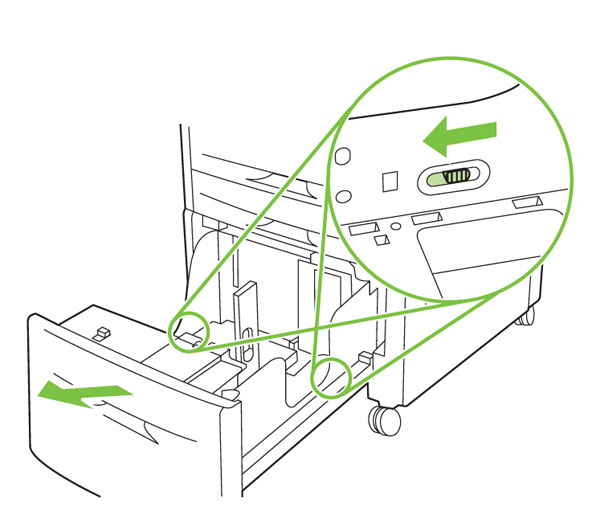
9) To replace the Type 1 and Type 2 rollers: Open Tray 2 and pull it out until it stops.
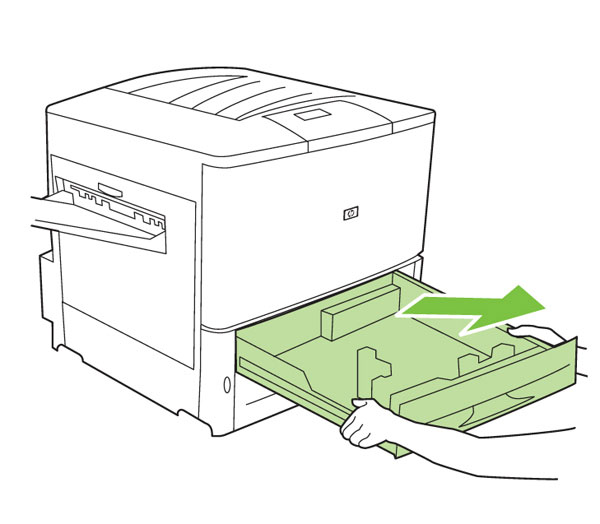
10) Remove the tray by lifting the outer end while pulling the tray free of the printer. Repeat steps 9 and 10 for Tray 3.
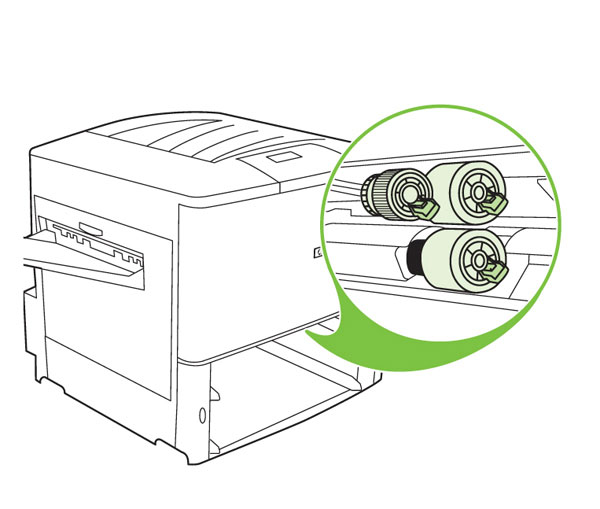
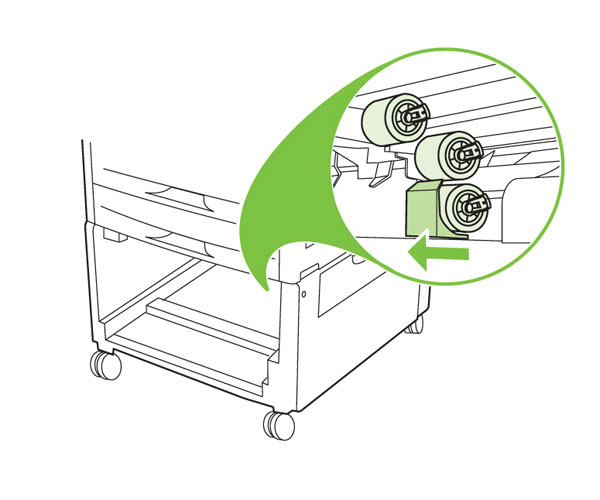
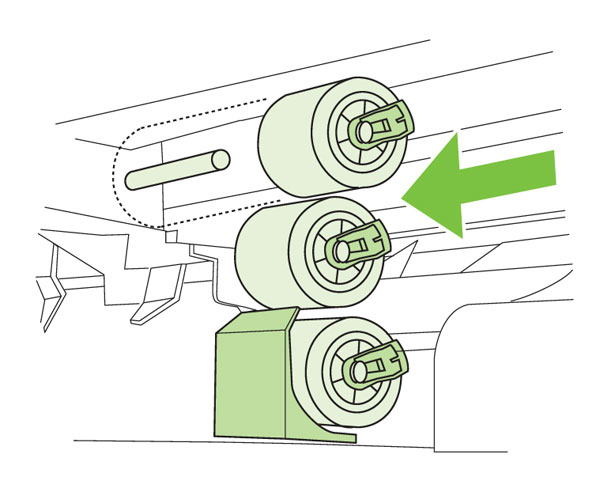
11) You will gain access to the rollers through the empty paper tray slots (three rollers per tray).
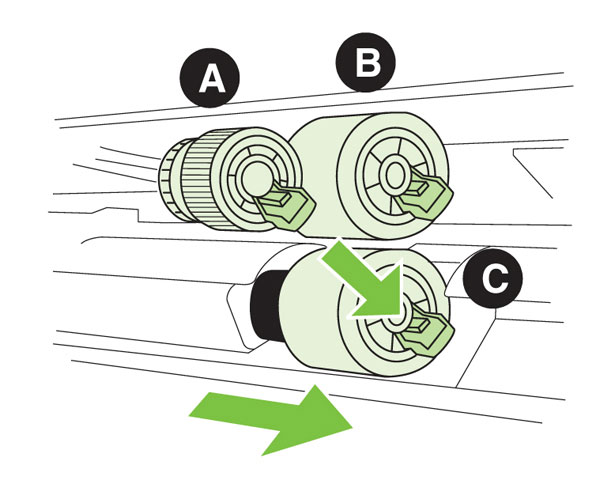
12) To remove the rollers from the shafts: pinch the tab on the end of each roller, and then slide it off of the shaft. The rollers are as shown: A) pickup roller (Type 1); B) feed roller (Type 2); and C) separation roller (Type 2). CAUTION: Do not remove the black spacer from behind the separation roller. If the black spacer comes off, carefully insert it metal edge first onto the shaft.
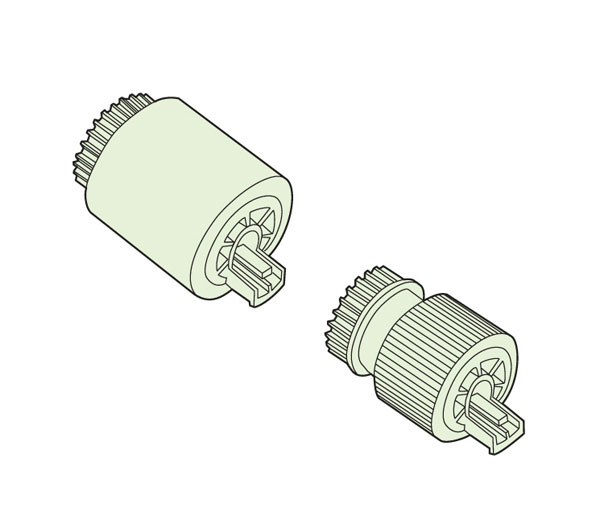
13) Remove the rollers from the plastic bag. You will use one Type 1 roller and two Type 2 rollers per tray.
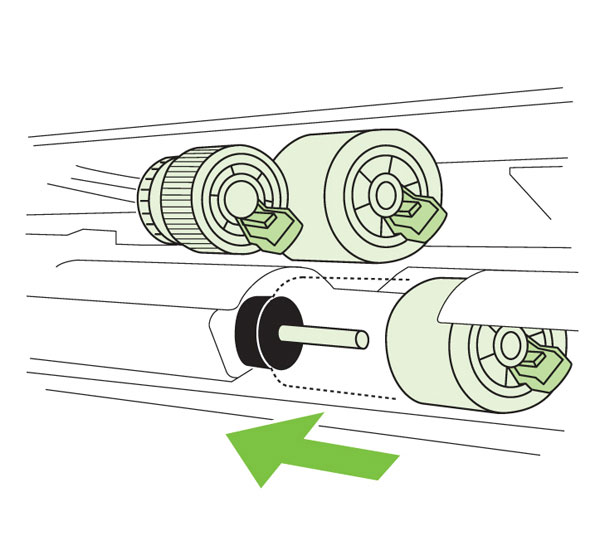
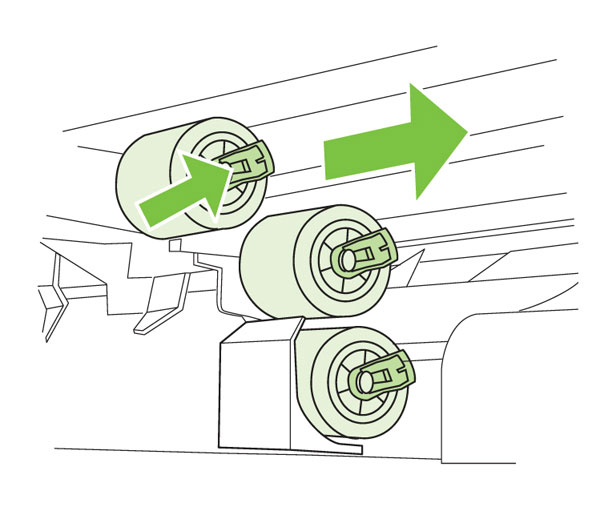
14) Slide the new rollers onto each shaft until they lock into place.
15) Reinstall Trays 2 and 3. If you do not have an optional Tray 4 (2000-sheet Input Tray), proceed to step 23.
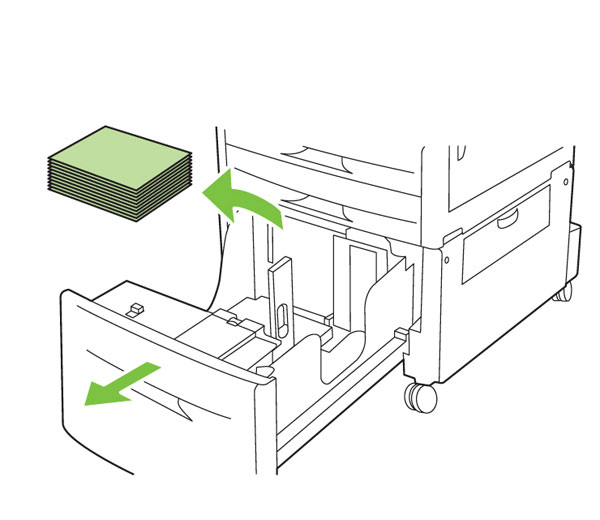
16) To replace the Type 2 rollers in Tray 4 (2000-sheet Input Tray): Open the tray, then remove any paper currently loaded in the tray. WARNING!: To avoid injury, the paper must be removed before Tray 4 is pulled from the printer.
17) CAUTION: Tray 4 could be damaged if it is dropped. Use both hands when removing the tray from the printer. Pull Tray 4 out until it stops. Locate the blue release buttons that are on both sides of the tray, and then slide the buttons toward the front of the tray. Pull the tray away from the printer.
18) To gain access to the separation roller, slide the blue roller shield toward the back of Tray 4.
19) Pinch the tab on the end of each roller, and then slide the roller off of the shaft.
20) Locate three Type 2 rollers contained in your kit.
21) Slide the new rollers onto each shaft until they lock into place. Note: You do not need to slide the blue shield back over the roller. It will return to position when Tray 4 is closed.
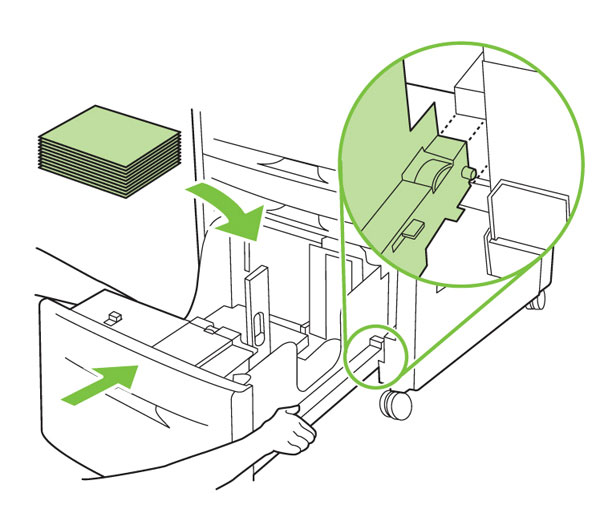
22) Using both hands to grasp the sides of the tray, reinstall Tray 4. Replace the paper, if desired.
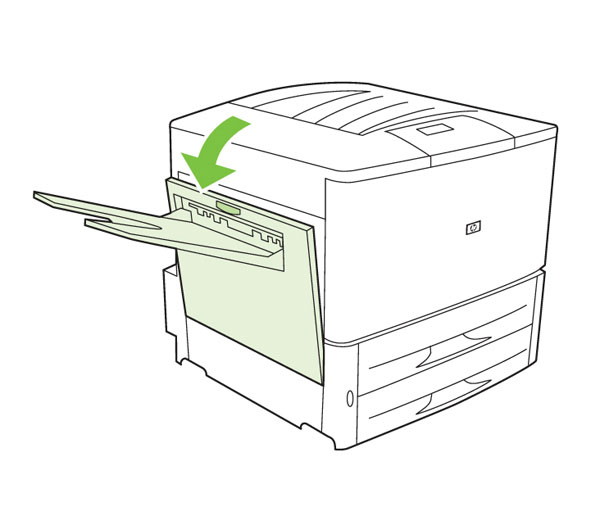
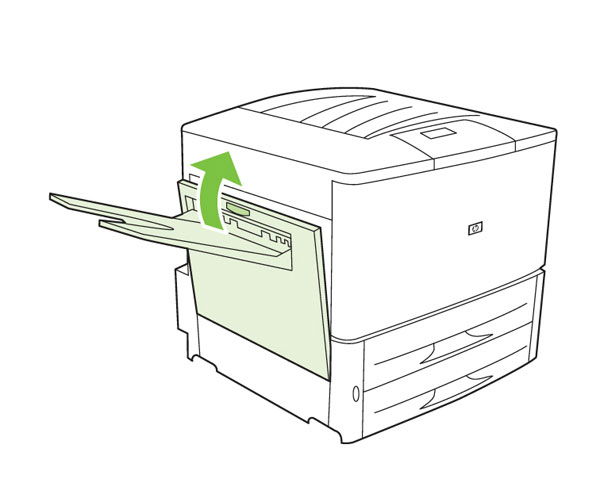
23) To replace the fuser assembly: a) If a paper-handling output accessory is installed, reposition it so that the left door of the printer is fully accessible. b) Open the left door. Note: If a face-up bin is installed, it is not necessary to remove it to complete this procedure.
24) If a duplex printing accessory is installed, remove it by pushing downward on the green tab and sliding the accessory out. Otherwise, proceed to step 25.

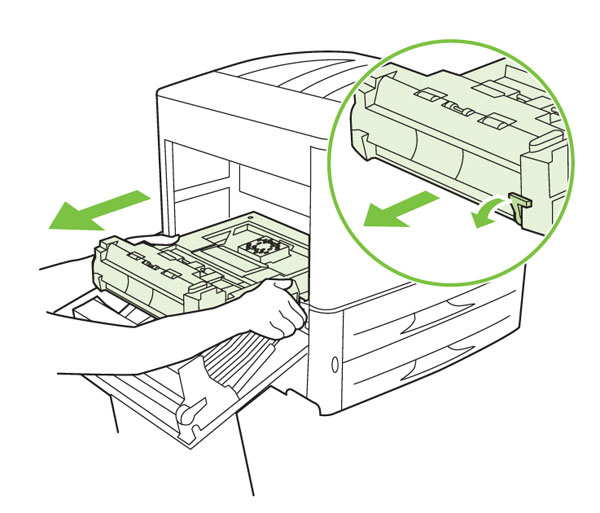
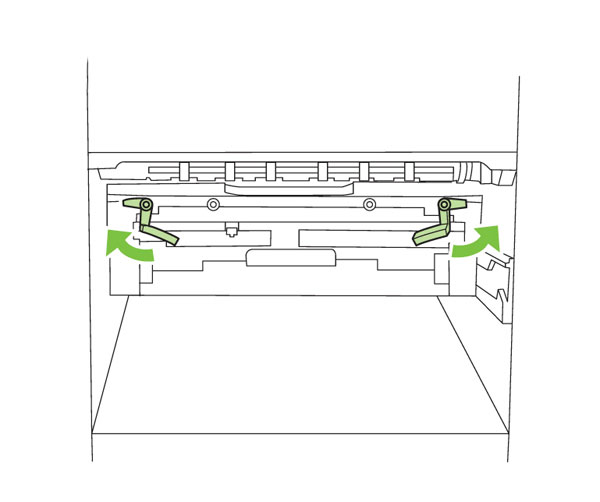
25) Locate the small blue levers on each side of the fuser assembly and rotate them toward the center as shown.
26) Lift up on the finger handle slightly and pull the assembly away from the printer until it stops.
27) Grasp the blue handle on the top of the fuser assembly with one hand. Place the other hand on the finger handle. Tilt the fuser assembly downward, then pull up slightly to remove it from the printer.
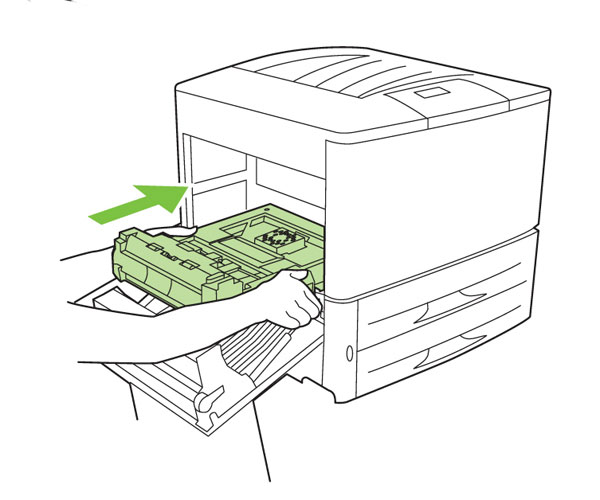
28) Remove the new fuser assembly from its package. Remove any orange packing material from the new fuser assembly by pulling straight out.
29) Align the fuser assembly with the bars on each side of the opening. Lift up slightly, and slide the fuser assembly firmly into the printer.
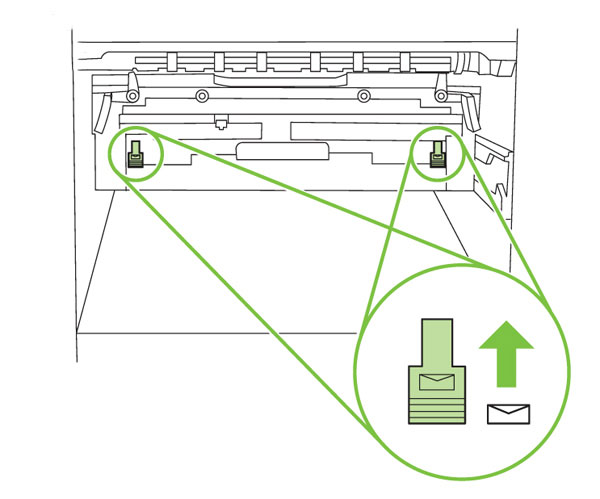
30) Once you are sure the fuser assembly is in place, rotate the blue levers away from the center as shown to lock the fuser assembly in place. Repeat the previous step if the blue levers do not rotate.
31) Avoid moving the blue, T-shaped envelope levers inside the printer. Note: If the envelope levers are moved to the top position, toner may not adhere correctly to the paper when you resume printing.
32) Reinstall the duplex printing accessory if it was removed.
33) a) Close the left door. b) Reconnect the power cord.
If you have a paper handling output accessory, move it back into position.
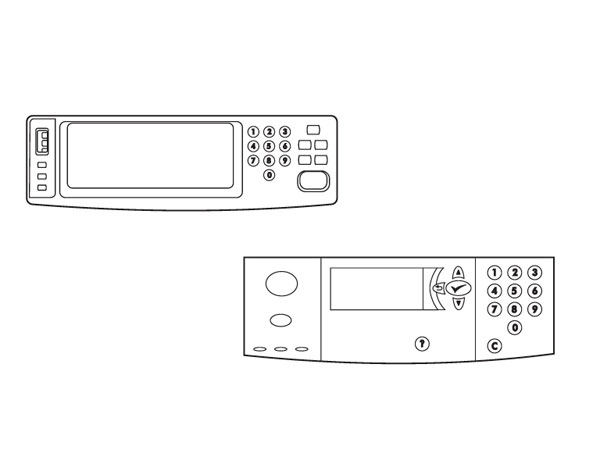
34) To reset the maintenance kit page count from the control panel, use the instructions for the following HP LaserJet products:
a) HP LaserJet 9000 printer
b) HP LaserJet 9000mfp/9000Lmfp
c) HP LaserJet 9040/9050 printer
d) HP LaserJet 9040mfp/9050mfp
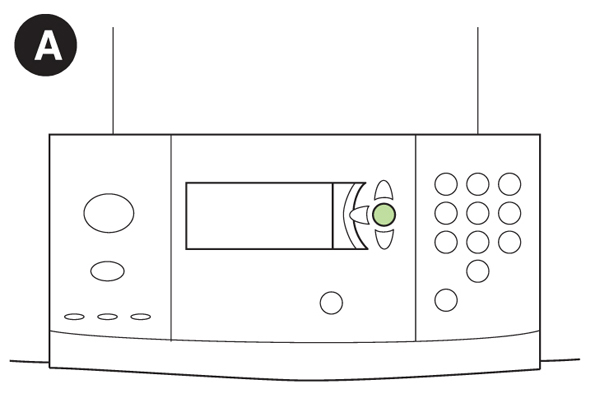
A) To reset the maintenance kit page count for the HP LaserJet 9000 printer: Press and hold the v button, then press the power button to turn the printer on (button in). When the three LEDs are on, press the ? key, then press v.
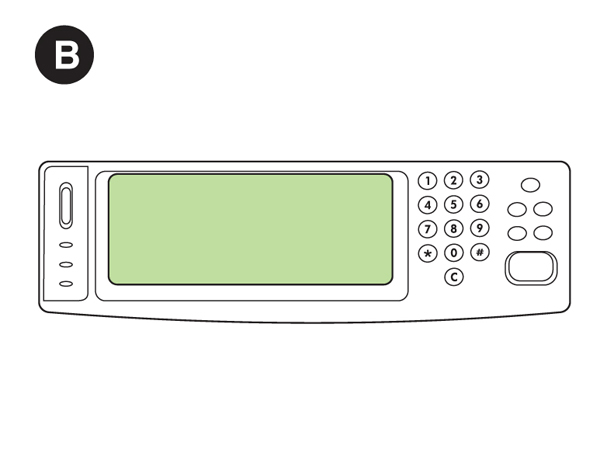
B) To reset the maintenance kit page count for the HP LaserJet 9000mfp/9000Lmfp: Press and hold the 6 button, then press the power
button to turn the MFP on. When the three LEDs are on, release the 6 button. SELECT LANGUAGE appears on the screen. Press and release the 3 button. NEW MAINTENANCE KIT appears on the screen. Press and release the 6 button again.
C)To reset the maintenance kit page count for the HP LaserJet 9040/9050 printer: Press the power button to turn the printer on (button in). When the memory count starts, press and hold the check mark button. When the three LEDs are on, press the up arrow key until NEW MAINTENANCE KIT appears on the screen, then press the check mark button.
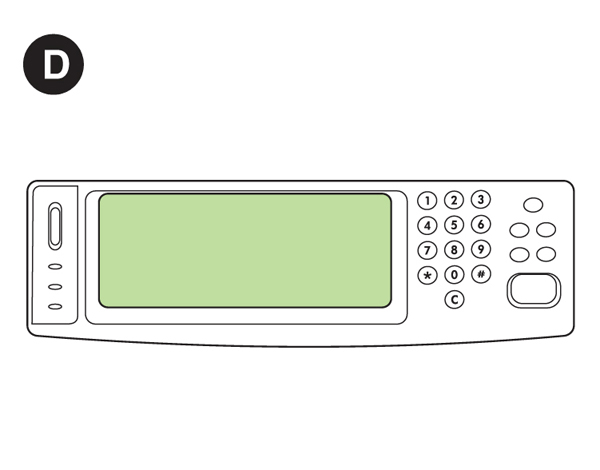
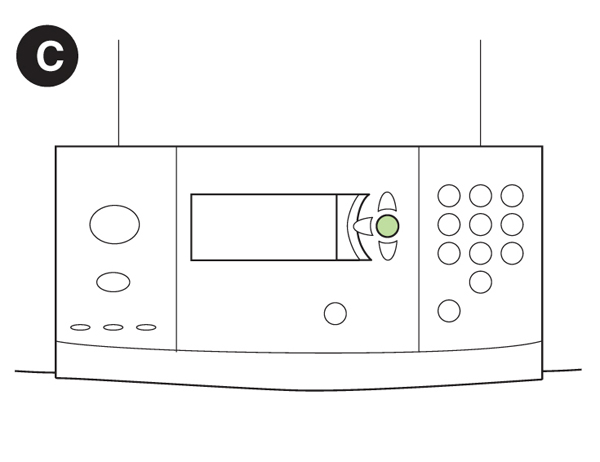
D) To reset the maintenance kit page count for the HP LaserJet 9040mfp/9050mfp: Press the power button to turn the MFP on. When the memory count starts, press and hold the 6 button. When the three LEDs are on, release the 6 button. SELECT LANGUAGE appears on the screen. Press and release the 3 button until NEW MAINTENANCE KIT appears on the screen. Press and release the 6 button again.
|


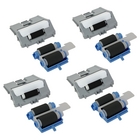 HP F2A68-67913 Tray 2 & 500-sheet Optional Feeders Roller Kit