Canon Image Runner C3380 Fixing Film Replacement Instructions
Canon Image Runner C3380 Fixing Film Replacement Instructions
Originally written for: Canon imageRUNNER C3380
Also applies to: Canon imageRUNNER C2880, C2880i, C3380i
Date:
Sep 05, 2013
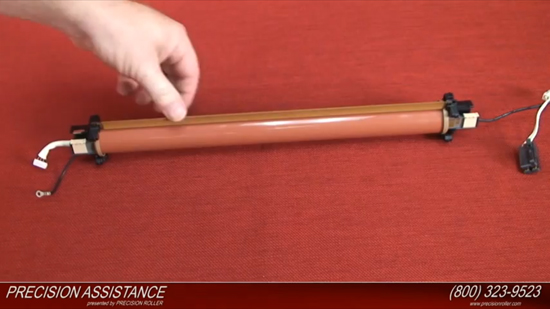
These instructions describe replacement of the fixing film for a Canon ImageRunner C3380 and similar models.
Applies To: Canon Image Runner C3380, C3380i, C2880, C2880i
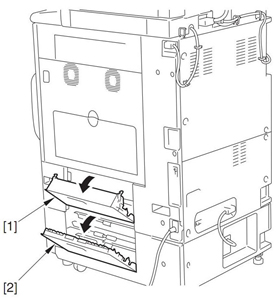
Before Removing Fixing Unit: Detach the rear right cover of the printer using the steps outlined below.
Open the cassette lower right cover [2].
Open the cassette upper right cover [1].
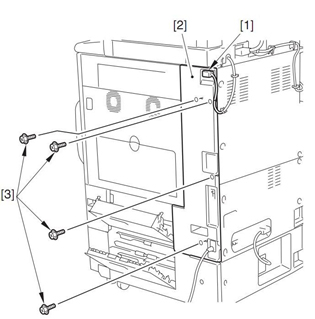
Disconnect the reader power cable [1].
Detach the rear right cover [2]. Note: The rear right cover is attached using 4 screws [3].
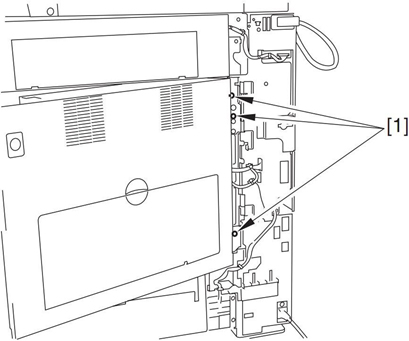
Removing Fixing Unit
Remove three screws [1] and open the double hinge of the right cover.
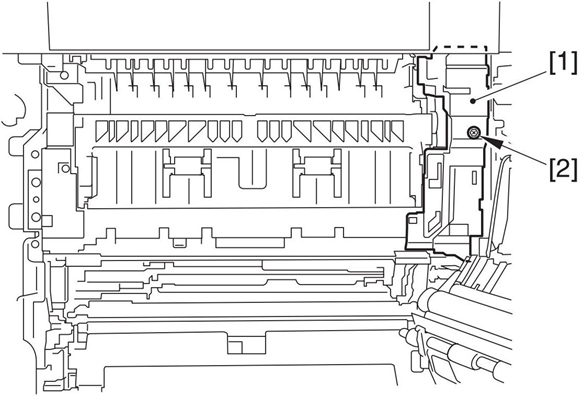
Detach the connector cover [1]. Note:The connector cover is held in place by one screw [2].
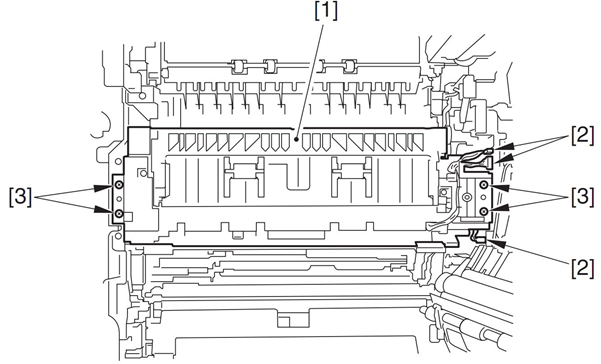
Remove the fixing unit [1]. Note: The fixing unit is held in place by three connectors [2] and four screws [3].
Removing Fixing Film Unit:
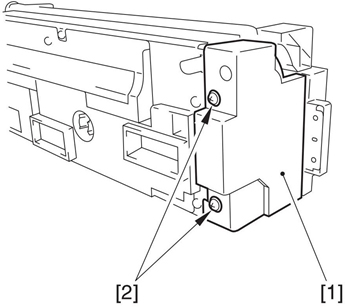
Detach the fixing front cover [1]. Note: The fixing front cover is held by two screws [2].
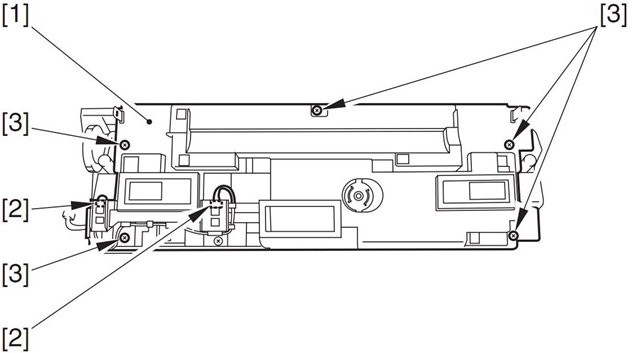
Remove the shutter unit [1]. Note: The shutter unit is held in place by two connectors [2] and five screws [3].
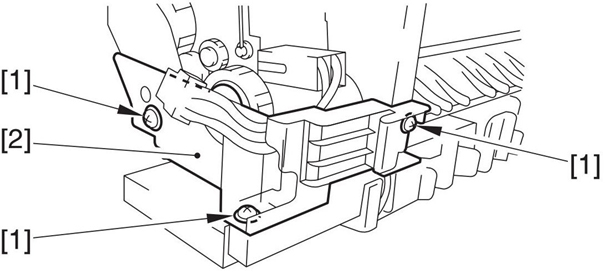
Remove three screws [1], and detach the cable cover [2].
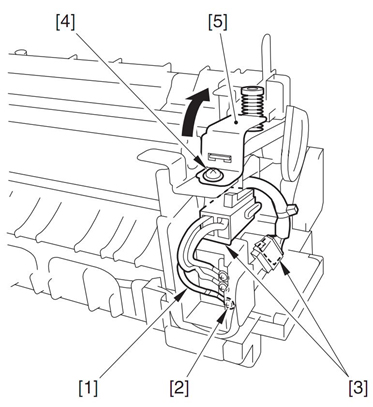
Disconnect the connector [1].
Remove the screw [2], and open the retainer arm [3].
Remove the screw [2] that attaches the grounding wire [1].
Disconnect 2 connectors [3].
Remove the screw [4], and open the retainer arm [5].
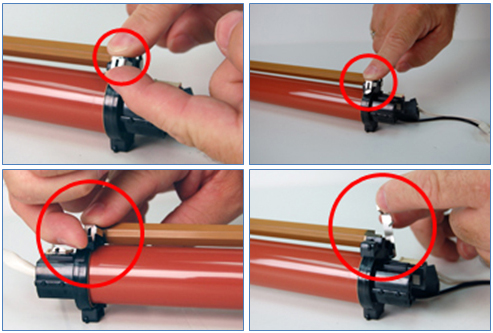
From the Fixing Film Unit [1], slide the 2 leaf springs [2] in the direction of the arrow and remove them. Next, remove the separation guide [3].
Removing Old Fixing Film From Fixing Film Unit:
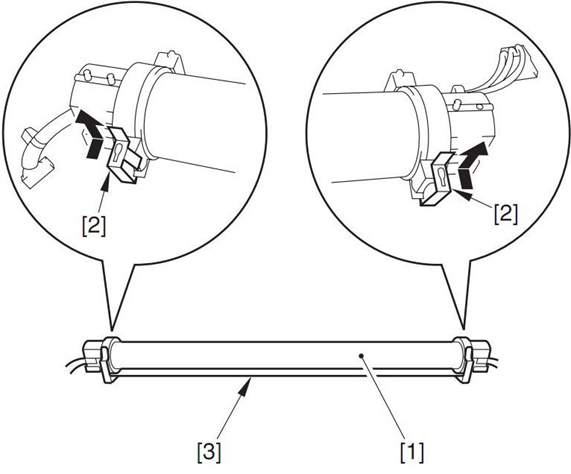
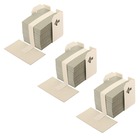
Remove the metal clips (shown below) from each side of the heater assembly.
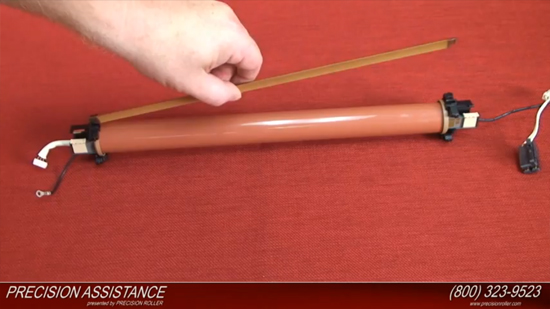
Remove heat stabilizer bar.
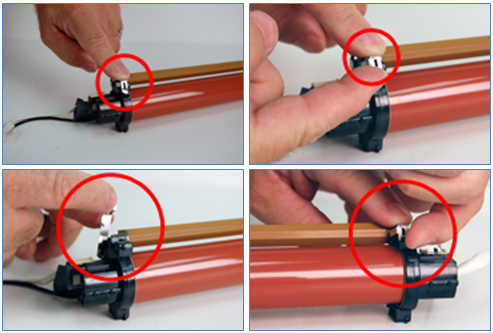
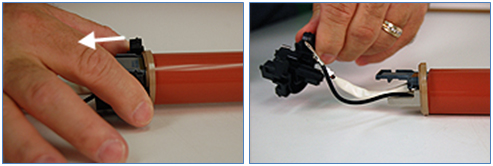
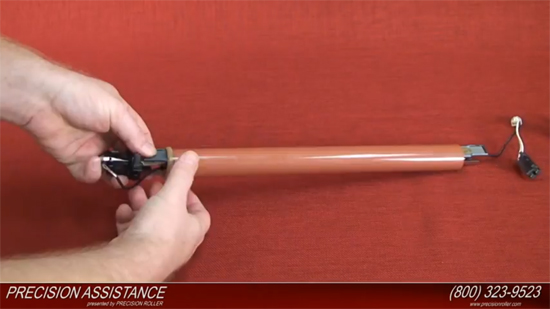
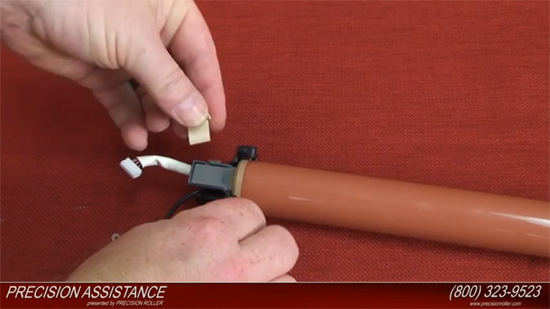
Remove the white plastic retainer clip (as depicted in the photo below) from the end of the heater assembly.
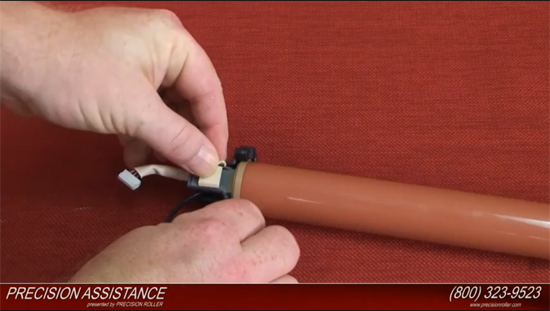
Remove the black plastic holder (as shown below) from the end of the heater assembly.
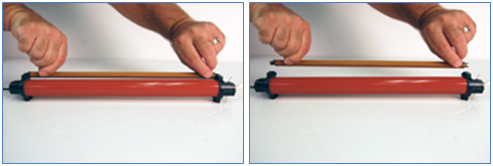
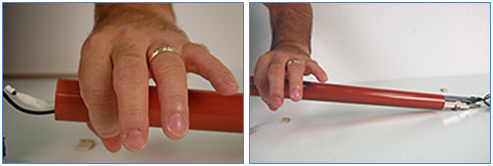
Remove the tan bushing ring from the end of the Fixing Film Unit.
Slide the old fixing film off the end of the heater assembly.
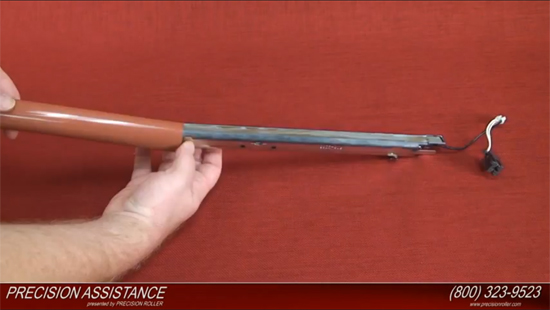
Installing New Fixing Film On Fixing Film Unit:
Clean the entire heater assembly using a dry cloth.
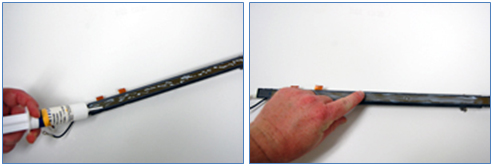
Apply 1+ grams of grease evenly on the surface of the heating element and on the side of the holders (as depicted in the photo).
Install new fixing film over the heating element. Caution: Do not scrape grease from heating element. Use extreme caution when installing new fixing film. Damage to film sleeve could result in premature failure.
Installing the old Fixing Film From Fixing Film Unit:
Slide the old fixing film off the end of the heater assembly..
Install the tan bushing ring to the end of the Fixing Film Unit.
Install the black plastic holder to the end of the heater assembly.
Install the white plastic retainer clip to the end of the heater assembly on both sides.
Install the heat stabilizer bar.
Install the metal clips from each side of the heater assembly.
Removing Fixing Film Unit:
Install the screw [5], and open the retainer arm [4].
Connect 2 connectors [3].
Install the screw [1] that attaches the grounding wire [2].
Install the screw [3], and open the retainer arm [2].
Connect the connector [1].
Install three screws [1], and detach the cable cover [2].
Install the shutter unit [1]. Note: The shutter unit is held in place by two connectors [2] and five screws [3] install all the screws and the two connectors.
Install the fixing front cover [1]. Install the two screws [2].
Installing the Fixing Unit
Install the fixing unit [1]. Connect the three connectors [2] and intall the four screws [3].
Install the connector cover [1].Install the one screw [2].
Install the three screws [1] and close the double hinge of the right cover.
Attach the rear right cover [2]. Install the 4 screws [3].
Individual brands are copyrighted by their respective owners. Precision Roller is in no way affiliated, sponsored or endorsed by these copyright owners or their affiliates or dealers
This website uses a secure server to encrypt all sensitive information.


 HP C8091A Staple Cartridge, Box of 3